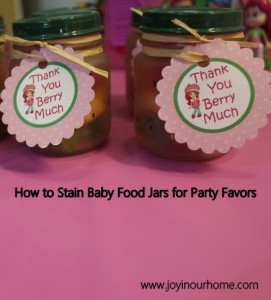
Good morning everyone! How’s your week going? If you’re like me, you are yearning for spring. I enjoy winter a lot, but I’m itching to wash all our winter coats, mittens, hats and scarves and tuck them away. I’d also like to get outside with a big pail of sudsy water and scrub those windows. So anyway, since my thoughts are on warmer days, I thought I’d share these cute Strawberry Shortcake treat jars with you today.
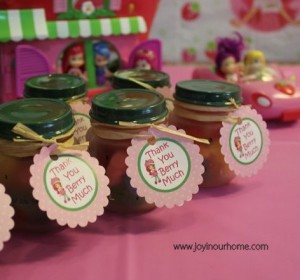
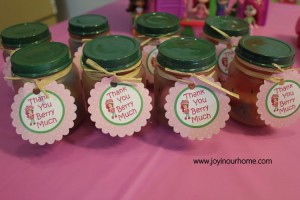
Our little girl loves Strawberrry Shortcake so that was the theme she chose for her last birthday. I had a collection few empty baby food jars laying around, just waiting for the perfect Pinterest project to use them for. So when I came aross these sweet little jars, I jumped at the chance to make them! They are very easy to make… just plan ahead so you give them plenty of time to dry!!
Materials:
*empty baby food jars with lids (however many favors you want to make)
* Elmer’s glue
* red food color
* permanent black marker
* green spray paint (I just used cheapest can you can buy at Walmart and it was perfect)
The first thing you’ll need to do is clean the baby food jars well and dry them. I decided to make my own modge podge and it couldn’t have been easier. I mixed 1 cup of water and 1 cup of glue (I used a plastic sour cream container). Drop in red food coloring until you reach the shade of pink/red you want. Go slow and keep stirring, and then add another drop or two. Don’t overdo it.
I started on the bottom of my jars, turning the jar upside down. I used a small brush and “painted” the jars from the bottom to the to/mouth of the jar. Use gentle strokes. I moved my jars after painting them so they wouldn’t stick to the newspaper.
Allow the jars to dry for at least two days. Do not wet the jars as the glue and color will run!
While the jars dried, I spray painted the lids. This was super easy. Just spread the lids on a large area of newspapers and spray paint them to get all angles of the lids. I gave mine 3 coats to make sure they were well covered.
Once the jars were dry, I used a black sharpee to make “dots” for the strawberry seeds. Super easy again, and it makes them more real looking.
The printable for the tags can be found at: The Suburban Mom
For the tags I used:
* a hole punch
* a daisy punch
* white cardstock
* twine, raffia or whatever you have on hand
First I glued the Strawberrry shortcake tags onto the white cardstock just to give them more support. I then used the daisy punch to cut them out, punched a hole on top and used my raffia to attach them to the jars. I filled ours with little berry gummy candies to go with our berry theme! These little favors couldn’t have been easier and got rave review at the party. Most of all, our little girl loved them!
Linking Up To:
Anything Goes
Frugal Crafty Home Blog Party


The baby-jars are perfect for this project! I love it…. i bet your little girl did too…. 🙂
Have a terrific Tuesday!! “hugs” Crystelle
Crystelle Boutique
Thx so much Crystelle! Yes, they are perfect… and I keep collecting them for more projects 😉 Hugs back! have a great day!
These look amazing- who wouldn’t like to receive that as a gift?!
Gayle x
http://makethriftlovelife.blogspot.co.uk
Thx so much Gayle! Love your beautiful blog as well…. Will have to visit again! Thanks for stopping by!
the words ‘Strawberry Shortcake’ and I can smell her and all of her friends :o) these are adorable party favors!
Thanks so much Melissa! 🙂 That brought a smile to my face. Have a great Wednesday!
These are adorable! What a lovely party favor!
Thank you so much Lisa! 🙂 I appreciate you stopping by! Love your beautiful blog as well!
Love these they are so cute 🙂 What great party favors!
Thanks Kim! They were so fun to make. Thanks again for stopping by! 🙂
I went to a Strawberry Shortcake dress up party when I was little, it was so fun. I was the lemon girl, don’t remember her name. Your favors are lovely. Hope you will join us tomorrow for the Anything Goes linky party.
awww… what sweet memories! That would have been Lemon Meringue! Thanks for stopping by! I joined your party… and hope to again!
So cute!! Love this idea. Thanks for linking up at Take it on Tuesday!
~ Betsy @ Romance on a dime
Thanks so much Betsy and thanks for hosting! 🙂 love your blog!
These jars are adorable! The printable tag you found goes along perfectly! Thanks for sharing this at Frugal Crafty Home Blog Hop & I hope to see you back on Sunday night!
Thanks Carrie! I appreciate you stopping by! “See” you Sunday night! 🙂