Hello Everyone!
How’s your summer going? I hope you’ve been enjoying some nice sunny weather!
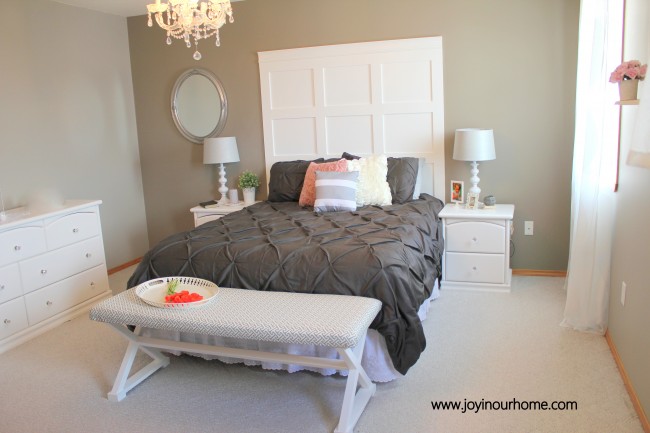
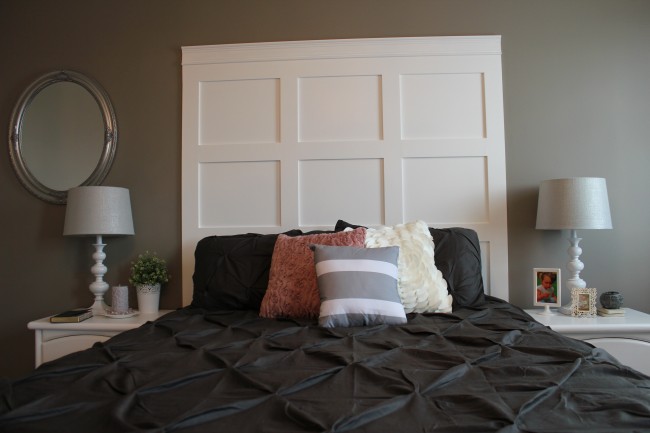
Do you remember the One Room Challenge I participated in and tackled our Master Bedroom? If you want to see some before and after pictures of our bedroom, check it out here. The board and batten headboard pictured below was one of the many DIY projects in this makeover. Today, I’d love to share the tutorial of the headboard!
Supplies:
MDF baseboards (these came in a package of 10 8foot pieces from Home Depot. Ours were already primed)
Wood Filler
Paint (color of your choice)
1. The first thing we did was figure out where exactly we wanted the headboard. My husband made it 2inches wider on each side of our bed. (Note: We have a queen size bed, so if you’re using this tutorial for a single, double or king you’ll have to change the measurements accordingly.
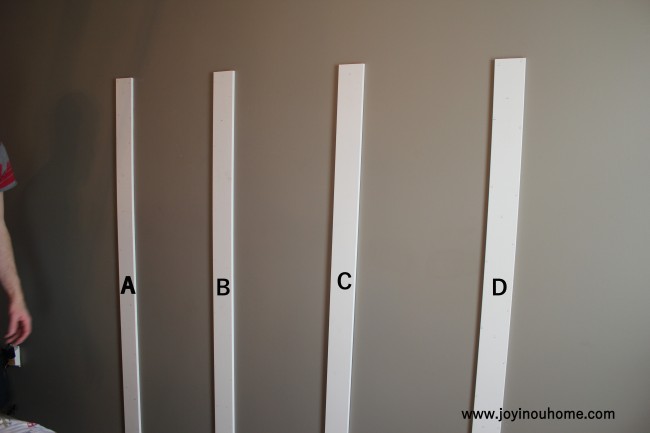
2. My husband cut the 4 pieces of wood pictured above 73 inches in length. That is from the floor to the top of the headboard. Don’t fasten them to the wall just yet. 🙂
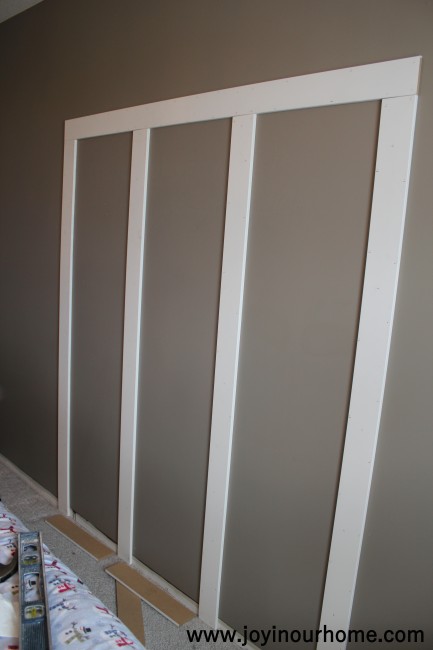
3. The top horizontal piece is the first one you will fasten to the wall. It is 64inches in length.
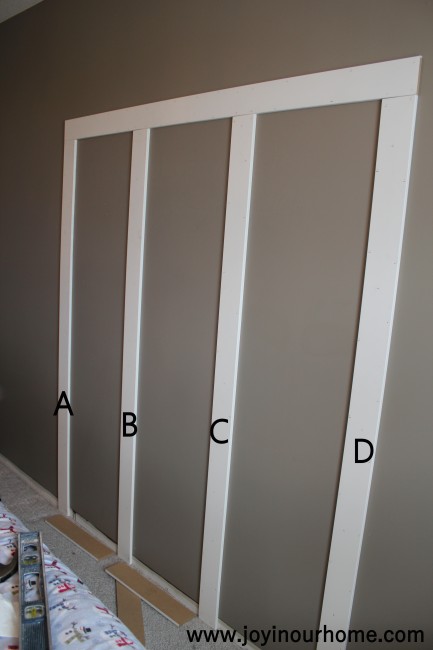
4. Fasten A and D to the wall first. B is 16.5 inches from A. And C is also 16.5 inches from D.
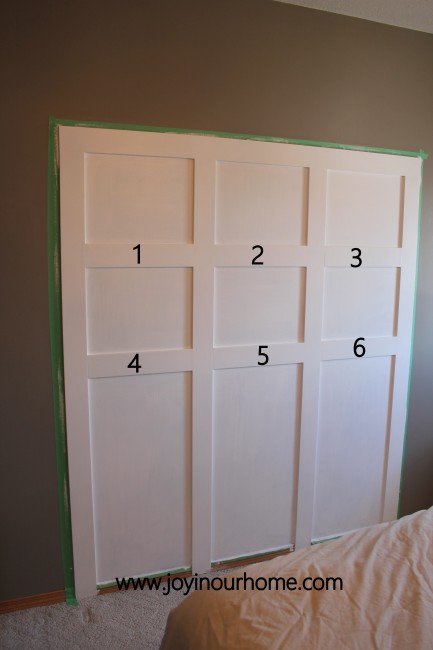
5. Next, you’ll cut 6 pieces of wood 16.5 inches wide. These are the pieces pictured above. We decided not to go all the way to the floor as you’ll never see the bottom part of the headboard with the bed being there. Pieces 1, 2, and 3 are exactly 13inches from the top horizontal piece. Fasten them to the wall. Next, pieces 4, 5 and 6 are exactly 13inches from 1, 2 and 3.
6. I didn’t get a picture of the next step (sorry!!) but you’ll want to use wood filler to fill any cracks where your joins are. Sand them off after they’ve dried and reply wood filler as needed. This is a little tedious but important for a smooth and perfect finish!
7. When your surface is totally smooth and there are no cracks, you can begin painting. My husband gave ours 3 coats of paint.
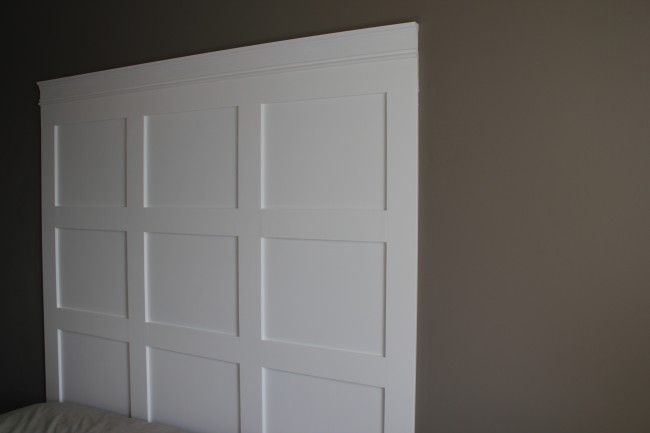
8. We also decided to put some crown molding on the very top and I think it just gives it a beautiful finishing touch. It will be 64inches wide if you decide to apply one.
One thing we would do differently next time, is paint the wall before you fasten all the pieces of wood on. I think it would just make painting more smoothly and quickly.
I hope this helps you install a headboard! It’s my first ever step by step tutorial of something we made and designed. I’d take more pictures of each step next time but I hope it helps anyway!
Have you ever installed board and batten in your home? I think if he’d have time, my husband would install it in every room and hall way and stairway…. well, you know! Everywhere 🙂
Thanks you so much for coming to check it out! I appreciate my readers so much!
Have a wonderful weekend,
Kendra
Linking To: 3 Little Greenwoods, Party In Your PJs , Inspire Me Please, Grace At Home, Everyday Enchanting, The Dedicated House, Mix It Up Monday, Artsy Corner Link,


This is STUNNING! I’ve thought of doing a whole wall, but it never occurred to me to do a headboard … I LOVE it!!! The white looks so crisp and pretty against your dark grey walls too!
Thanks so much for your sweet comments, Kristi!! I think a whole wall would look fabulous as well… give it a try 😉 Thanks for stopping by!
I love this headboard! And the lamps. And the bedding. And the chandy. 🙂 This is a fantastic tutorial! You’ve got a beautiful bedroom and y’all did a fabulous job on the custom headboard!
Thanks so much Lisa! I always appreciate your encouraging comments 🙂 That chandy was $100 and it was on clearance for $20! We may have bought more than one 😉 Thanks for coming by!
Oh my gosh, Kendra. This is genius. Looks gorgeous!!
Thanks for your sweet comments, Amy! So glad you came by!!
I love how this turned out Kendra, so amazing! Sharing it on my FB page this week!! Hope you are doing well:)
Thanks so much Krista! That means so much to me 🙂 Summer has been fabulous; Hope your’s is as well! Thanks for coming by.
This is a great idea. You make it look easy to make. We don’t have a headboard so maybe I can talk my husband in cutting the wood so I can make this. Thank you!
Thanks so much, AmieJo! I hope you can convince your husband… it would look fabulous 🙂 Thanks so much for coming by!
I <3 your head board!!! I've been waiting to make one and I might make mine one section lower. I still have to finish painting my light gray walls. Great advice to paint my wall first:) Pinned!
So glad you found some inspiration, Michele!! 🙂 Yes, I’d defiantly paint the wall first next time! So glad you came by 🙂
I’m pretty attached to my current headboard, as it has storage space, but regardless this looks lovely!
Thanks Sarah! So glad you stopped by 🙂
What a great idea! Your bedroom is gorgeous!!
Thank you, Amy! Thank you for coming by! 🙂
Love love love this headboard! Well done and great tutorial. Thanks for sharing on Show-Licious!
~ Ashley
Thanks so much for your comments Ashley! They always make my day! Love your “party”! Have a great rest of the week!
Gorgeous idea. It looks beautiful! Thank you so much for sharing at Tuesdays at Our home. Enjoy your day! Maria
Thank you MariaElena! Happy to link up at your party 🙂 Thank you for coming by and have a great rest of the week, too!
Thank you Maria! Hope you have a great week as well 🙂 Thanks for stopping by!
This headboard is gorgeous! It really pulls the bedroom together.
Thank you so much, Jessica 🙂 I think so too! Glad you stopped by!
This is absolute perfection. I am definitely going to try this out. I was just wondering, how did you fasten the wood/mdf to the walls? with glue or nails? I live in a rental so i have to be mindful of that
Thanks for the inspiration!
This is a fantastic idea! I love board-and-batten wall treatments, of course, but I think I like this even better! The white looks especially stunning against the dark wall. Great job!
Thank you for joining Grace at Home! I’m featuring you this week!
Thanks for your sweet comments, Richella! Always appreciate you stopping by!! Have a great rest of the week 🙂
Your headboard turned out beautiful!
Thanks SO much April!! I appreciate you stopping by!
Buying baseboards is a genius idea! We’re heading off to pick up supplies for our board and batten headboard today, thanks to you it will be even simpler now. I’m painting ours espresso 🙂
I bet it turned out beautiful, Nikii! So glad our post was helpful!! Hope you’re having a wonderful week and thank you for stopping by!
How did u attach the boards to the wall?
We used an air nailer, Darla 🙂